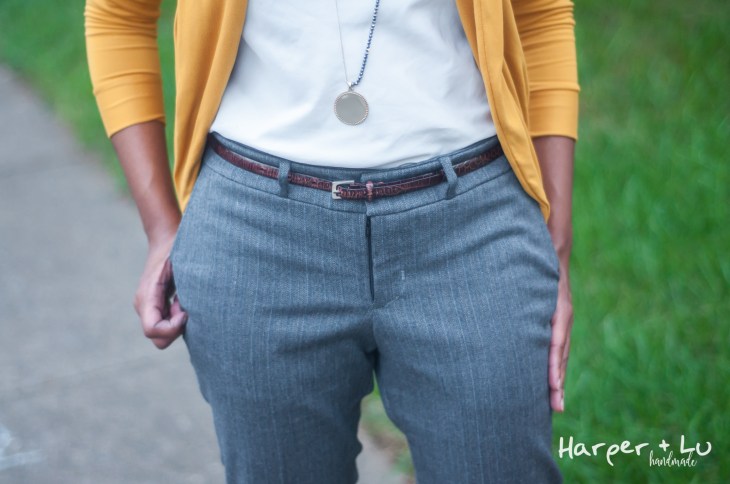
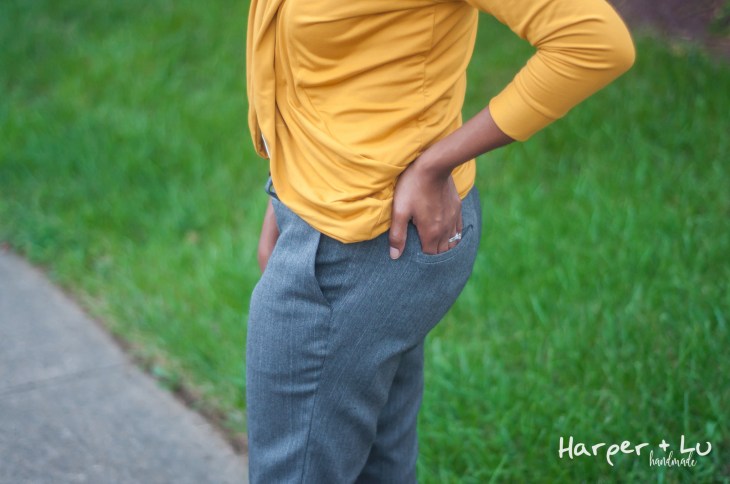
Let me present to you — my fly! I recognize that not everyone will see the accomplishment summarized in this photo – but I made a LEGIT pair of dress pants/trousers/slacks (what do we call these nowadays?) – and I am over the moon ecstatic with them. They are FAR from perfect, but as a wise seamstress shared with me when I was complaining over some garment – “perfect is the enemy of good” – and I realized then, that sometimes finishing is half the battle (fitting is in fact the other half – I hope to tackle that someday soon).
Oooohhh – Pick Me Please!
When Kennis of Itch to Stitch posted a testing call for the North Point Trousers*(affiliate link), I knew I needed to raise my hand. About a year ago, I signed up for a Craftsy class to create a pants sloper. Of course – I never finished the course – but I did draft an initial pair that you can see here:
https://www.instagram.com/p/BM85-WrhZQS/?taken-by=macsmakespace
(YIKES… That side seam is a hot mess – it should travel a straight vertical line from waist to hem… So much to learn – so little time)
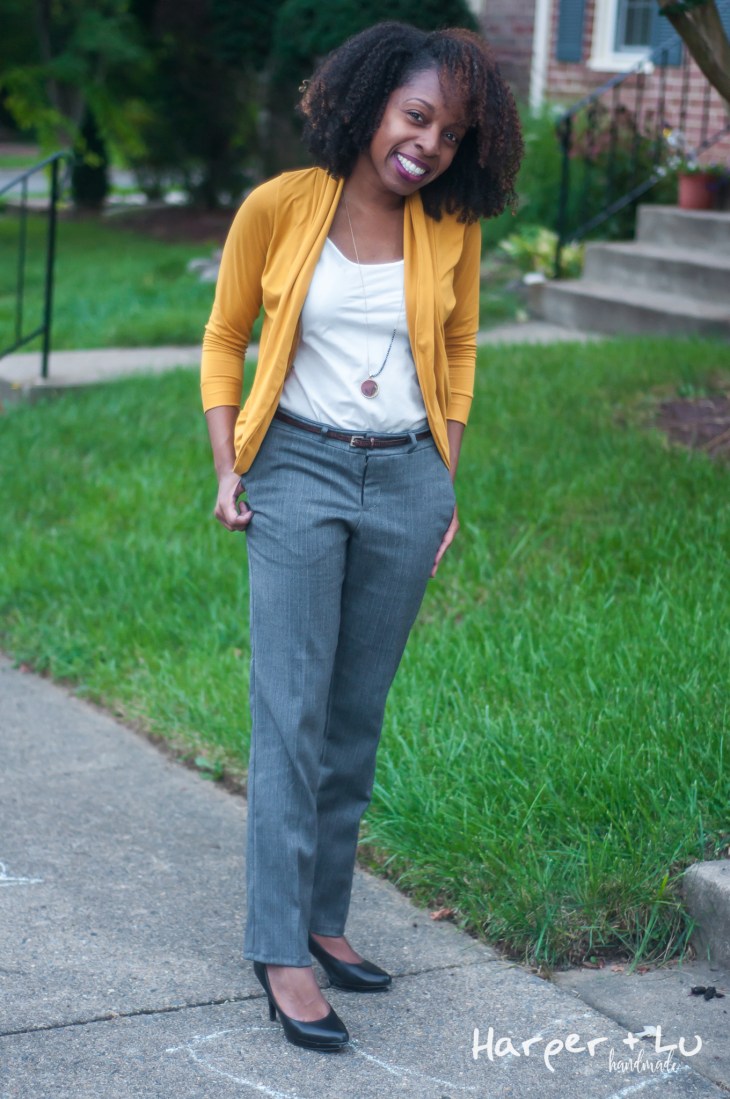
Fast forward a year and I STILL hadn’t completed a full pair of woven dress slacks with all the fixin’s – and let me tell you – this pattern has them all! There are pockets galore (slant front and back welt pockets) and other bells and whistles – but I will let the pattern description do the talking:
A pair of well-fitting trousers is gold—that’s why you need to make yourself a pair of North Point Trousers! The North Point is modeled after ready-to-wear trousers, with the superb details and instructions that you expect from any Itch to Stitch pattern. Designed to use a stretch woven fabric, the North Point Trousers are also comfortable. You won’t regret making this pair of classic trousers, and they will be a staple of your wardrobe.
North point Trousers Feature:
- Classically sleek straight leg silhouette
- Medium rise and curve through hip and thigh
- Ankle length that can be lengthened or shortened
- Contour waistband for a better fit
- Streamlined front slanted pockets
- Strong and durable back single-welt pockets
- Fly front with zipper and double hook and bar closure
- Use of stretch woven fabric for comfort
- Layers feature (print only the sizes you need)
This is NOT for the faint of heart
I feel like I would be remiss if I excluded that this pattern took approximately 80 steps and two weekends for me to complete (I wish I was lying, but alas…) PART of this is the intricate details that Kennis includes which walk you through every step and question with detailed photos and even video tutorials for trickier steps. She also includes instructions for how to make a muslin to assess fit – which I was thrilled about because I couldn’t make sense of which steps to follow and which to exclude (mostly because I’m new to this). The other part is, well life, and that it was ALL new to me, there are lots of pieces that require accurate cutting, and you really do need to take the time to make a proper muslin (ideally with the same fabric).
Overall – this is a lovely pattern and will hold your hand through completing an exceptional pair of pants! I found myself wishing that they had a full lining (some of my favorite dress trousers have a full lining), but I also recognize that would have been ENTIRELY too daunting for me, so I am easing my way into the items that require greater skill and technique. I always feel like I am leveling up with an Itch to Stitch Pattern!
Assessing the fit and details


I ended up making several tweaks based on my muslin and my dimensions (you can read about my standard fit adjustments here):
- Lowered the front 1/2″ at the lengthen shorten line
- Increased the back rise 1.5″ (I used a slash/hinge technique – only adding at the CB seam) – and also completing a low butt adjustment (deepening the CB seam allowance) — attractive name for an adjustment, no?
- Shortened the back inseam 1/2″ and stretched it to align with the front inseam
- Used a 5/8″ seam allowance instead of the 1 1/8″ allowed (I have a 31.5″ inseam)
- Lowered the waistband 1/2″ – this was a mistake that worked to my advantage… I missed the step to stabilize the top waistband seam – and quickly learned why that step is there when my pants were flaring at the top (whoops) – I had to go back and fix that for sure
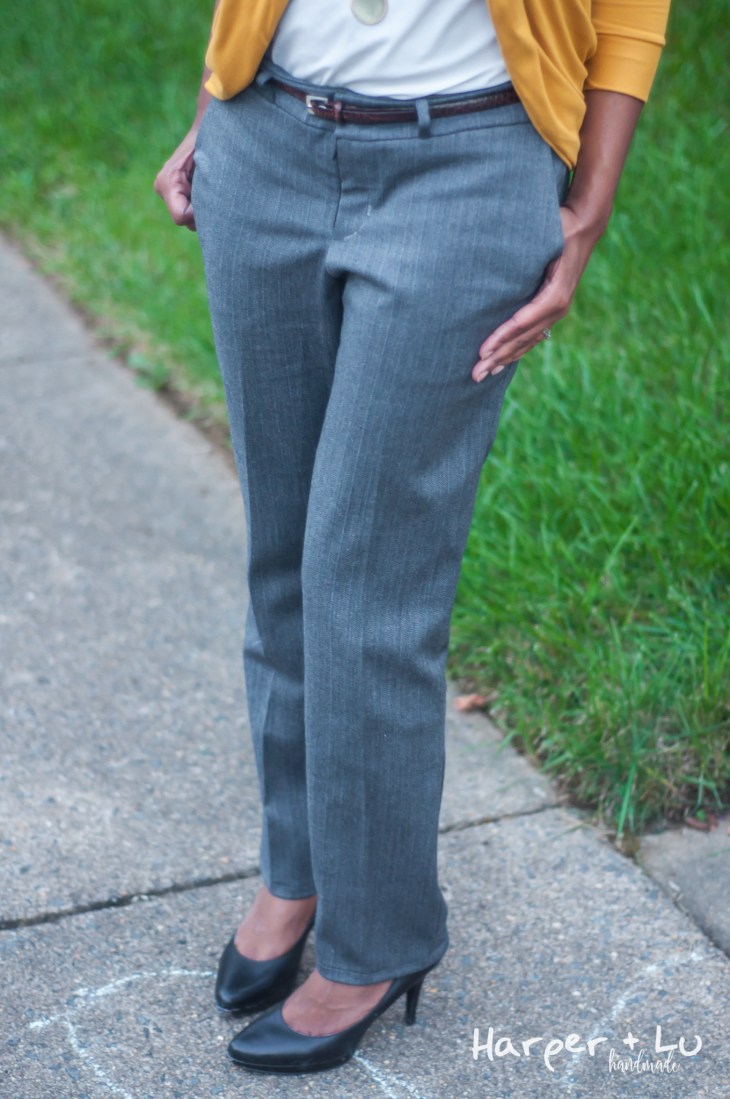
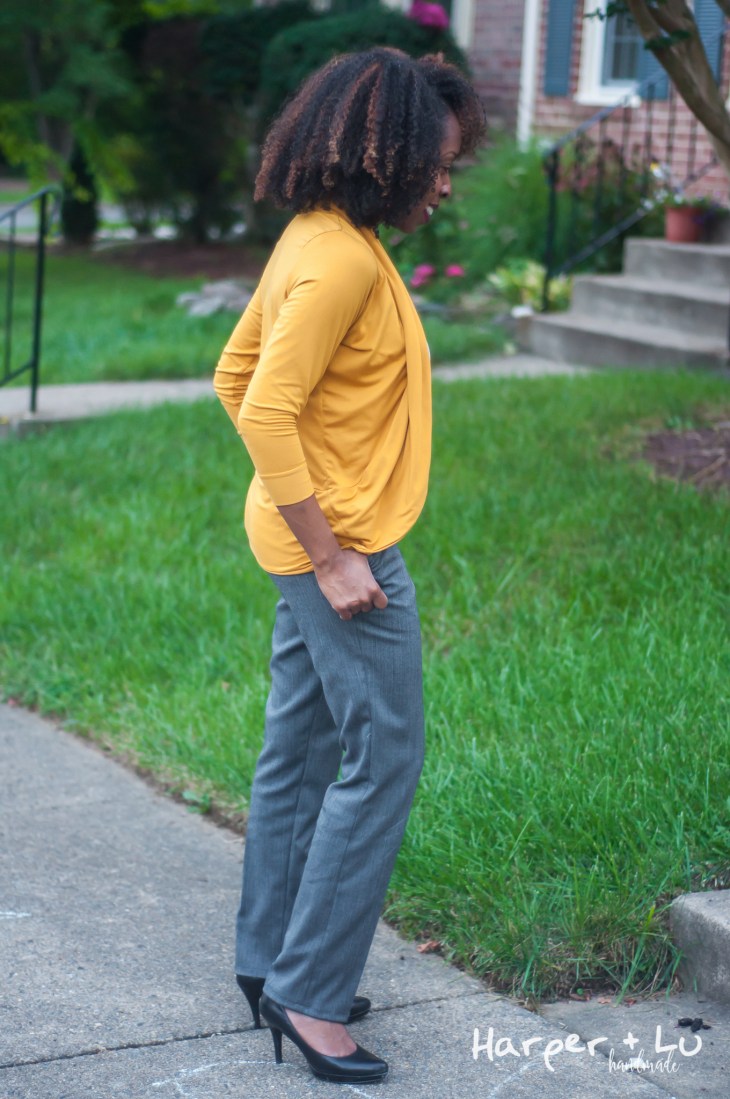
I think the rise is pretty good! When I sit, I usually have my pants pull down in the center back, but not these babies – and for that fact alone – I am grateful. I will also say that if I tried these on in the store, I wouldn’t have hesitated to purchase them and on (well – perhaps if they didn’t have such questionable welt pockets, lol). It’s funny how now that I sew, my eye goes to EVERY. SINGLE. WRINKLE. as something that MUST be eliminated (or that I should go down trying). So, on that note…
Help me read my wrinkles!
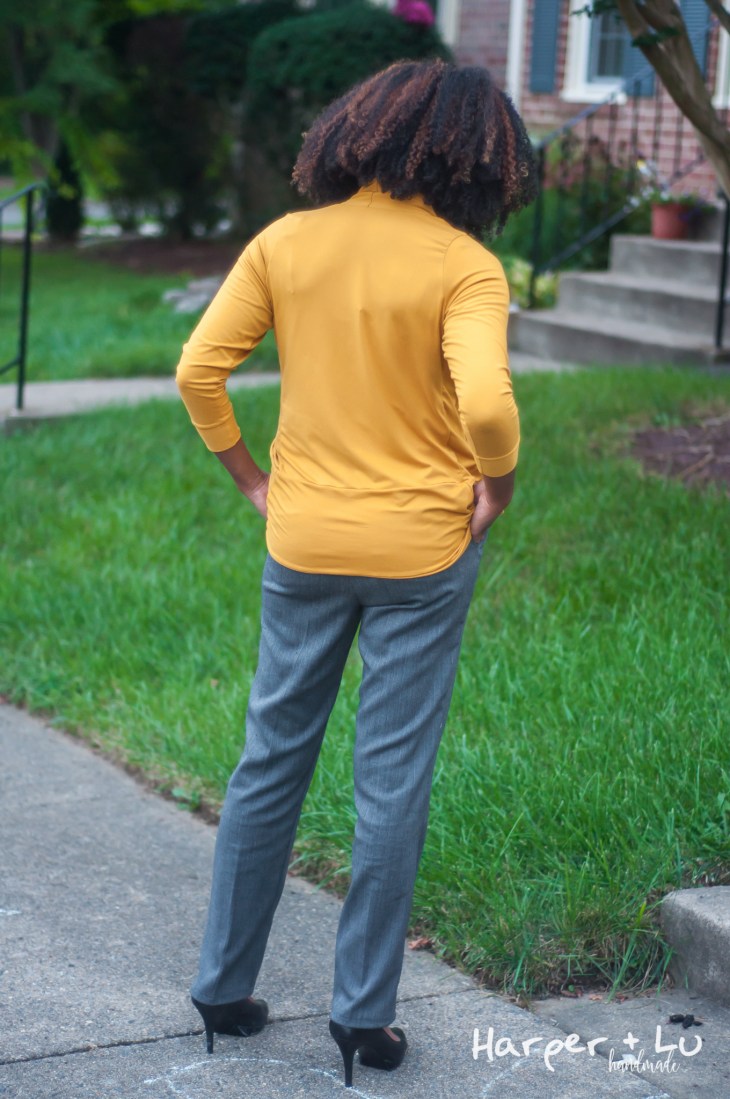
While I am happy enough with these, in the interest of continuing to improve – I would love to figure out what I should do next to get a better fit. I have a couple of theories, based on all the pant fitting references that I have used (images are from the Closet Case Files 14 Common Jeans Fitting blog post):
Shorten the crotch (ewwww – I really am not crazy about using that word)


Adjust for my “thin thighs”
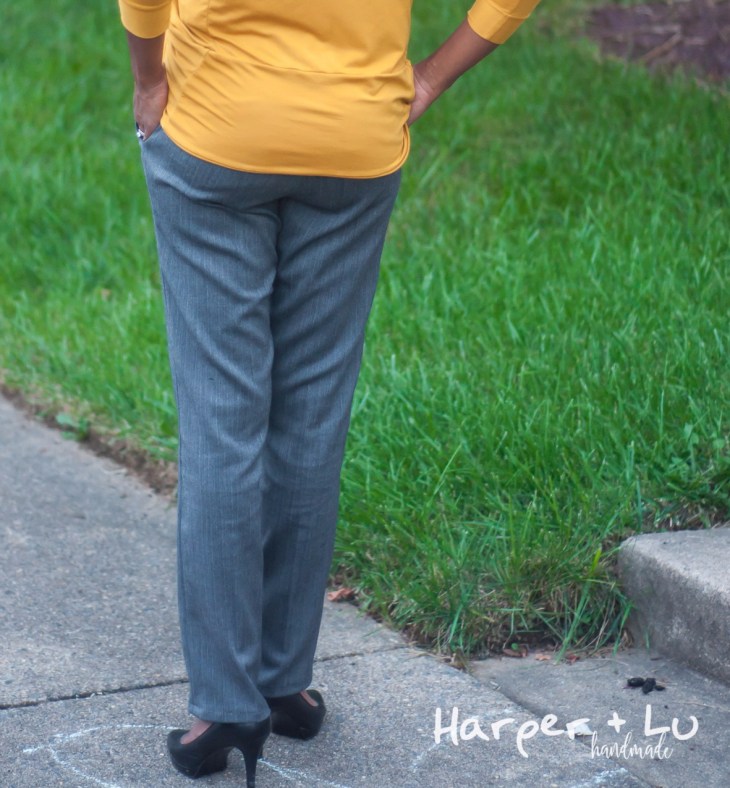
Both seem to point to shaving off some of the back inner seam…


What am I missing? I attempted to increase the seam allowances considerably – but ended up overfitting them (which was a total disaster)…
So what say you? Ready to give the North Points* a try?

Looking at it, you need a little more fabric across the front of your pants – looking at how your pockets are gaping and the wrinkles at both CF and the side seams. That’s literally maybe 1/4″ on all your side seams there. You may also possibly need a full thigh adjustment. I’m being picky too, if I found a RTW pair that fitted like yours I’d buy a couple of pairs!
LikeLike
Winner! Your pants/trousers look wonderful. Great fit. I also love your sweater. What pattern & fabric?
LikeLike
I love this. I have been toying with the idea of pants and i like to learn new things because I’m less than a year into apparel sewing. I’m just so intimidated by pants. Maybe I should just jump in and get these Friday 😊
LikeLike
Yes – you should! It’s like leveling up for sure!
LikeLike
Perfect is the enemy of good is such good advice. These look great though! For next time, I would try shortening the front rise a tad to get rid of that fold below the zipper. In the back, if you shorten the inseam too much, you’ll get a wedgie (ask me how I know…). I would try scooping out the curve to make it more of an L-shape. This removes some fabric from the centre thigh on the lower curve of your rear, but it doesn’t affect the side seams or the width across the fullest part of your rear (which looks like it fits really well). It’s kind of like a swayback adjustment for your upper thigh.
LikeLike