
I’m SLOWLY working up the nerve to create a pants series (be patient with me) – but that means I have to conquer my fear of pants head on! Now, admittedly, one could argue that repeating the same pattern isn’t QUITE groundbreaking – and I would tend to agree with that point, but for one simple caveat – this time I used a stretch woven (a twill to be exact) – and THAT my friends is a GAME CHANGER!
First Time’s a Charm

If this isn’t your first time here (and if it is — WELCOME!) – you will likely remember this pair of the Jalie Eleonore Pants that I made a little while back (see link here to read more). They were made out of a ponte fabric and were damn near perfect out the gate (don’t you love it when things work out that way?!?!). However, I will note – they are stretchy pants (I can’t say that without channeling Nacho Libre!) – which are TOTALLY forgiving! I purchased the fabric last Christmas at Cali Fabrics and SWORE I would use it this past spring – but my fear got the best of me, so now we’ve got bright pink stretchy pants for Fall and I will be turkey ready when the time comes!

Man, I tell ya – woven fabrics are a WHOLE different ball game! They will show every wrinkle, dimple and imperfection with their stiffer fabrics and lack of vertical stretch (see my Love Notions Sabrina Slims post for more of my thoughts on why you SHOULD start with a 4 way ponte if you want to dip your toe into making your own pants).
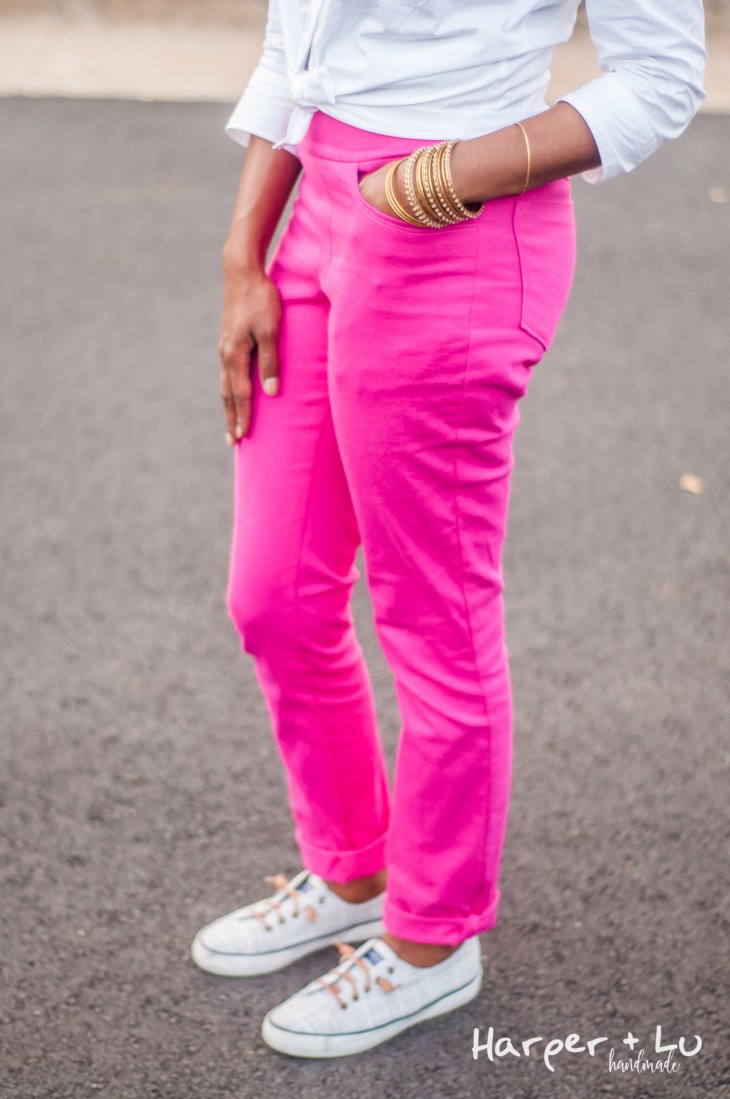
Umm, Are Those front POCKETS?!?

I felt the need to start by talking about the most obvious change that I made — adding pockets! Hallelujah – I love this pattern – but not having front pockets just feels… Wrong? There is a great hack out there for how to do it, so I will spare you and I the need to recreate the wheel – and just point you to that lovely resource (click the link here). I came across this meme and it PRETTY much summed up how I felt about not having a pocket on these pants (not that I intend to do much more than you see in these photos – but I hate feeling robbed of a place to put my hands when I am trying to look cool!)

The pockets follow the tutorial with one twist. I used a quilting cotton for the lining, and then drafted a facing from the pink stretch twill so you can’t see the contrasting fabric from the outside. I have pictures of that below:


Exhibit A of me trying to look cool (I mean – you didn’t REALLY think I was going to put my whole hand in that pocket or that it would ACTUALLY hold something!)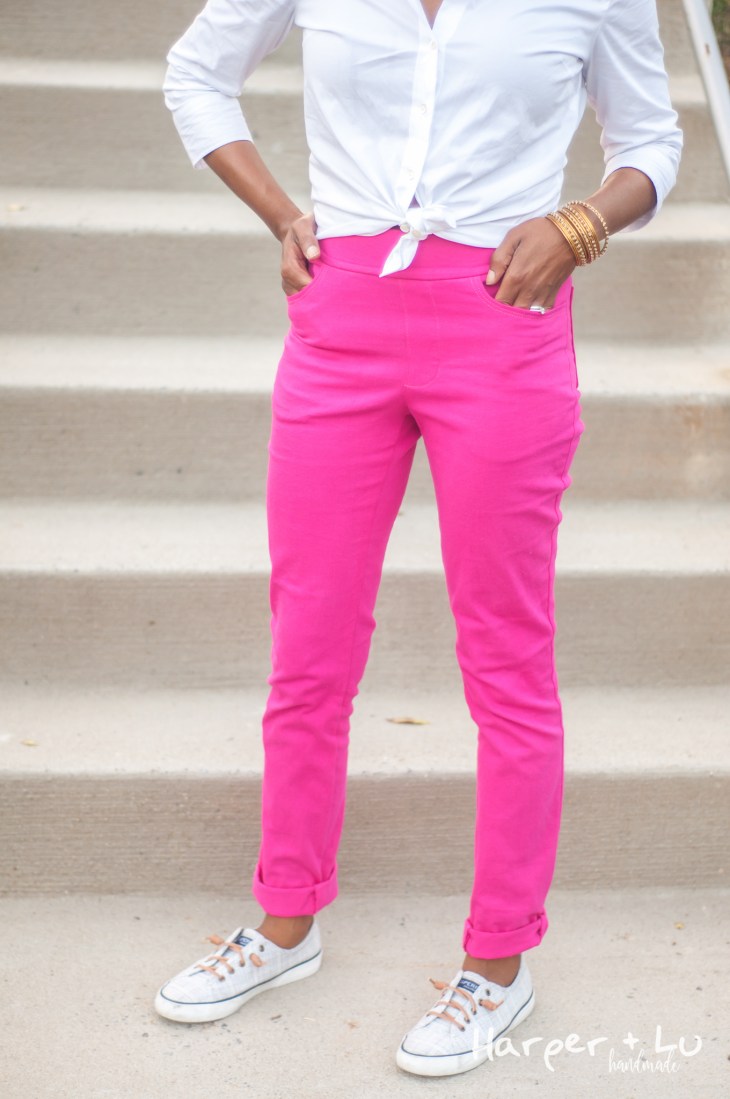
Yep – been there, faux pockets… Done that… Trying to avoid it for the future! I will admit, it adds some wrinkles and bumps to the front of the pants – but EVERYONE has some sort of wrinkles on their pants normally, am I right? I mean – you simply cannot move around in something all day and not have some wrinkles – no?
Working Through My Other Adjustments – S-L-O-W-L-Y
For starters, I always like to reference back to my standard adjustments post – it helps you to get a sense for my measurements and how your own might compare. I also went through the motions evaluating what changes I would make to the leg opening/hem, the legs, etc. I agonized for far too long (and brought my sewing facebook groups along for the ride – though I am feeling triumphant to have settled for good enough (‘perfect is the enemy of good’ right?)


Beyond adding front pockets, there are a couple additional changes that I did finally land on. I learned through my Itch to Stitch Trousers (see post here), that I have thin thighs, a low butt, and that I have to increase the rise of my pants in the back for comfort. I’m telling ya, pant fit diagnosing is NOT for the faint of heart! If you want to look up some of these adjustments, Closet Case Files has an awesome blog post here that covers what to look for to assess your pant fit.


In the case of these pants, I actually wanted them to be more high rise (so I could wear it with a crop top or tie front top like this), so I added 1 inch to both the front and back of the pants, and then added an additional 1/2 inch to the back yoke. Additionally, I took a significant amount out of the center back waistband and elastic – this helped to fix the gapping I had when I first put them on (it’s basically like a huge dart that ends just south of the yoke.
All in – let me tell you – this is the first time in a pair of woven pants that I can sit down and NOT be exposed on the backside!!! I know at least SOME of you must know what I am talking about! I also took in both the outseams and inseams 1/4 inch – which is a whopping 1 inch on each leg and 1/2 inch through the hips. These seem to fit better with those changes.

The last thing that I did was taper the pant leg a bit towards the bottom ~4 inches of the pant leg. I find that the pant leg opening (the official term for the hem line) has to be narrowed to accommodate my thin legs/ankles – or I get a pretty unattractive bell effect going at the base of the hem I took out the equivalent of 4 inches on each pant leg! This is a customization store bought pants wouldn’t give me! I also didn’t hem the pants – they are raw and cuffed – just the way I like them with my shoes.

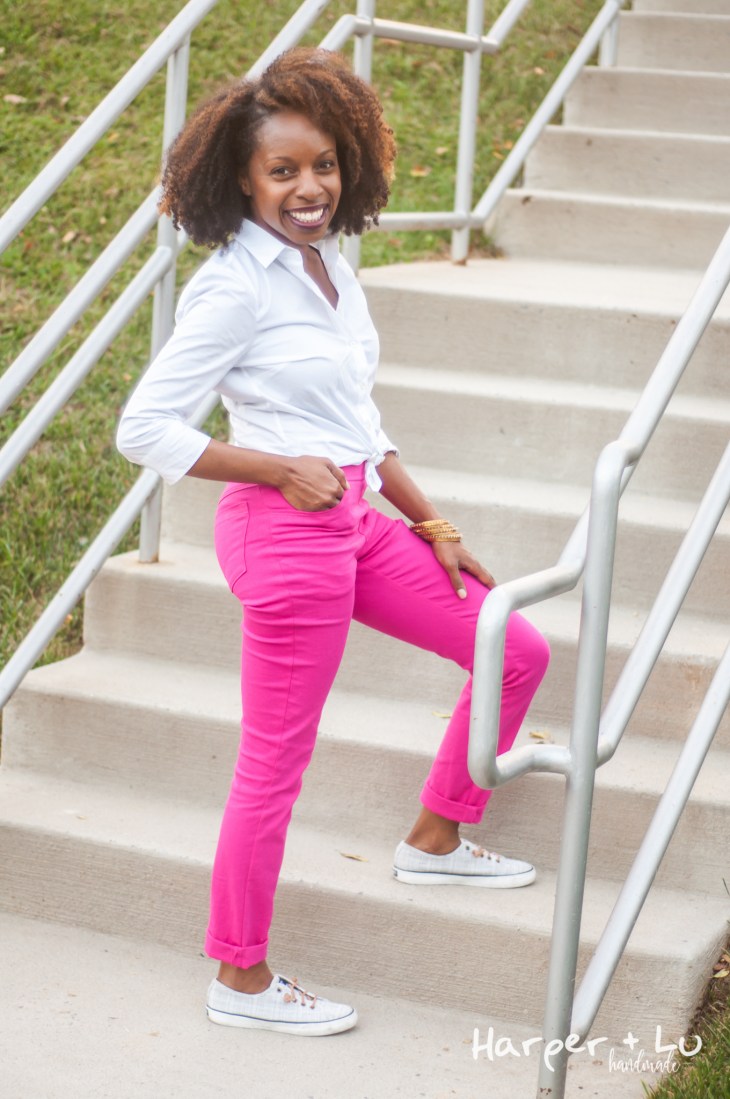
Thought I would end with one last shot to fill your screen with more hot pink yummy goodness (after the outtake above that my husband caught of me reacting to my lovely – yet very distracting – children).
Are you all sewing up pants too? I have THREE other pant patterns lined up:
The Alina Design Co. Chi Town Chinos,

the True Bias Landers,

and the SBCC Manhattan Trousers

and I can’t seem to bring myself to start taping patterns together or get motivated to start ordering/cutting fabric… Any favorites out of the bunch? If I am keeping it “100” as the young folks say – you all will most likely see an easier make for my next post! Haha – and hopefully it won’t take me another half a month to check back in!

Very nice….I am still working up the courage to tackle pants after sewing for 30+ years!!
LikeLike
GREAT JOB and oh that color – LOVE …. you should be proud of your accomplishment.
LikeLike
PERFECT – oh and that color ….. you did a great job and should be proud of your accomplishment.
LikeLike
I’m so excited to see your post on the Landers. It’s going to look incredible on you.
Thanks for all the detail here! I have the Eleanore pattern and am terrified of it, so reading all your details here and in the groups is super helpful to know what to watch for as I dive in.
LikeLike
Yay for pants that fit you how you want them to!!!! I love these on you, Mac!! And that jeans with no pockets meme is TRUTH! What’s the point of pants, and especially jeans with fake pockets? Madness.
LikeLike
Thank you for all this great information !
LikeLike